why do we use Sanskrit in yoga

Why Do We Use Sanskrit in Yoga?

AUM or Om  ( Sanskrit : ॐ) is a sacred sound or vibration from which all the manifest universe emanates.

Whether you’re new or a seasoned yogi, chances are you’ve heard at least a few Sanskrit words. Sanskrit is the ancient language the first yogis spoke and the language in which many historic yoga texts were written.

At Yoga Fever we teach Sanskrit in our teacher training courses, but we also use it often throughout our classes (not ALL of our teachers use it!). I personally love teaching Sanskrit, as it connects us to the history and origins of the practice, helping students better understand where the practice came from.

More and more, people are coming to understand that there’s a deep and rich philosophy beneath yoga practice. Sanskrit is the language by which that philosophy lives, breathes, and flows.

Why Do We Use Sanskrit?

Sanskrit literally connects us to the classical form of yoga that has been orally repeated for thousands of years.

When we use Sanskrit in our classes, we help students like you not only follow our directions but also get the most out of each session. Each Sanskrit word is believed to have its own consciousness, and pronouncing the word allows you to tap into that consciousness.

Through Sanskrit students are able to understand spiritual concepts that aren’t readily available in English. No other language can translate the mystical, transcendent, and divine as effectively.

It’s important for all of us, both teachers and students, to remember to be patient. We teachers repeat certain Sanskrit pose names often throughout class, as it often takes up to seven repetitions of a word for most people to remember it. Learning a foreign language takes a long time, but understanding some of the roots and most common words is a great first step! Read on my studious yogis.

Sanskrit Crash Course

Asana– This word refers to the poses that compile the physical practice of yoga. Maybe you’ve noticed that each individual pose ends in “asana.” For example:
Sukhasana- Easy Pose (the cross-legged, sitting position usually taken at the end of class)
Balasana- Child’s Pose

Ardha– A word which means “half,” ardha is used in poses like Ardha Chandrasana (Half Moon pose).

Namaste– The universal greeting, namaste is a combination of two Sanskrit words: nama, which means “bow” and te, which means “you.” It can be translated a number of different ways, but I often explain it like this: “the light within me recognizes and honors that very same light within you.”

Kona– This component means “angle,” or “corner.” Examples include Utthita Parsvakonasana (Extended Side Angle pose) and Trikonasana (Triangle pose). I bet you can think of more!

Supta– This component means “reclined” and is used in many poses that ask you to lie on your back, such as Supta Padangusthasana (Reclining Hand-to-Big-Toe pose).

Ujjayi– You’ll hear us refer to this yoga breathing technique as “ocean-sounding breath.” It’s practiced with a slight constriction in the back of the throat so that an audible sound can be heard.

Now that you have a basic understanding of a few Sanskrit words, come attend one of our yoga classes. You’ll be excited to discover how much of our yoga practice includes these simple components!

4 reasons yoga reduces stress

4 Reasons Why Yoga Reduces Stress

Stress and anxiety exist in each of our lives. It’s unavoidable and part of the human experience. However, that doesn’t mean we can’t find ways to manage or reduce the impact that stressful situations have on us. Our daily responsibilities and worries don’t need to overwhelm us. And that, is where yoga comes in.

Let’s talk about four ways that yoga reduces stress and anxiety in our lives.

4 Reasons Why Yoga Reduces Stress

Yoga balances our body – The practice of yoga actually counteracts the influence of stress, which often drains our energy and leaves us tense, tight, and tired. Instead, yoga does wonders in reducing tension – almost like a massage does. Child’s pose is, perhaps, the quintessential example of the way yoga helps us decompress. It’s often used as a resting pose or counter-pose to backbends and inversions, allowing our spinal column to relax and inducing a sense of both physical and spiritual surrender. Each time our forehead rests on the earth, it signals the body it’s time for rest, peace, and quiet.

Yoga balances our mind – In addition to treating our body with care, yoga teaches us to befriend and quiet the dancing/monkey mind. As we cultivate presence and compassion, we’re able to hone in on the actions we can take right now, in this moment. Yoga allows us to ease our frantic mind, and forget about our long to-do lists for the duration of the class. Whether we’re holding a pose or flowing through a sequence, yoga teaches us to focus.  We become as some athletes call in ‘the zone’. In other words, everything else fades away and we become one with the task at hand — i.e. yoga.

Yoga balances our nervous system – Whenever we experience stress, our nervous system begins to act up, stimulating high adrenaline and blood pressure levels. While necessary in some dangerous scenarios, this reaction can be chronic when triggered repeatedly. We use the breath as our guide in yoga. Instructors constantly remind their students (and themselves) to steady and deepen their breath, through controlled, and sometimes numbered, breath patterns. The process of learning to steady and deepen our breath allows our whole nervous system to calm down and feel peace. As yogis, we know the quickest way to the present moment is through the breath. This is a great lesson we can apply outside the studio when tough situations arise; focus on awareness of breath. Use the breath to calm yourself down and find the present moment. Even when we are facing the eye of the storm.

Yoga helps us understand how our mind works – In my opinion, this is the most important point when it comes to long-term stress management. Most of our anxiety results from the way our minds operate to various challenges. The mind can help heal us or it can help cripple us. Yoga practice forces us into mindful awareness of the way in which we react to difficult situations. For example, when you find yourself in a tough place on your mat, do you immediately pull out of the pose? Do you push yourself harder? Do you get angry at the teacher? None of these responses are wrong or right. The point, rather, is that once you identify the way you respond to stress, you’ll be able to consciously choose a different response in the future – preparing yourself to fight back against stress and anxiety.

As you see, yoga allows us to slow down and really tune in to our bodies, our mind, and our breath. By simply focusing on one thing, we’re able to decompress and relax.

Believe in the powers of your body and mind working together in unison to support your overall wellness. It’s truly key to living a peaceful and more cognizant life.

simplify your pigeon pose in yoga

Simplify Your Sleeping Pigeon


Pigeon pose was actually designed to be a back bend with a ton of variations to chose from. The west decided to add the sleeping variation which can be a bit of a love/hate relationship. It’s amazing for runners, cyclists, or anyone with tight hips. But the problem is that many of us don’t understand the proper alignment of the pigeon yoga pose, which can really compromise the safety of our knees and SI joint.

We’ll walk you through a few ways to modify this pose to make it the restorative wonder it’s meant to be – rather than the pose you endure with clenched teeth toward the end of your practice.

First, what is Sleeping Pigeon pose and why is it so beneficial?

Yoga treats stiff hips in many ways, but the most common is through a collection of poses known as hip openers. Sleeping Pigeon pose is an extremely effective hip opener that works your front leg into an external rotation, while stretching your psoas muscle (it connects your groin to your lumbar spine) in your back leg.

English please? It’s really, really, good to practice pigeon and yoga if you sit at a desk all day. And when you practice it consistently, you’ll notice significantly more ease in your lower body as you sit, walk, run and stand.

The problem is that many of us tend to thoughtlessly fold into Sleeping Pigeon, which dumps tons of stress onto our knees and sacrum. If you’re eager to improve upon this pose, read on yogis.

4 Tips for a More Pleasant Pigeon

Ease into the pose- Begin in Downward Facing Dog. Extend your right leg behind you, then bring the knee up to replace the right hand. You want a 45 degree angle from right hip to knee. More than likely, your shin is not parallel to the front of the mat (yet). With time and patience, you may get there. The heel will be close to the body and that’s A-OK. The top of your left foot is resting on the earth behind you with the toes reaching straight back to avoid sickling of the ankle. Gently melt your hips down to the ground. You want to avoid dumping all of your weight into the right side of the body.

You can choose to stay here or, for a more intense stretch, extend your arms and chest to the ground in front of you. To fully experience the pose, keep the spine long versus rounding.

Use core muscles to square your torso- Once you’re in the pose, be sure to keep your hips squared to the front of your mat. This isn’t a twisty pose, so do your best to keep both hips facing the front. How do you do this? Engage and activate your core muscle to shift your front hip back toward your extended leg.

Take up space- At this point, you may be able to descend a little deeper into the pose. With your hands planted firmly in front of you, try scooching your back leg further toward the back of your mat. With every inhale, back out of the fold a bit, seeing if you can gather just a smidge more length through your spine. Then you can take up even more space as you fold forward on your exhale.

Modify when needed- It’s always okay to utilize the props found in the studio! Slide a yoga block or rolled up towel under your hip (the bent one) for extra support. There’s nothing to be ashamed about – even the most flexible yogis have days where they need some added cushion to protect their bodies.

Finally, keep in mind that Sleeping Pigeon may not be your thing. No matter how many alignment refinements you make, this just may not be the pose for you. That’s totally fine, you guys. Ask your yoga instructor for some alternatives, such as sucirandhasana (thread the needle) or lying pigeon (where you’re on your back and pull your thigh toward you). It’s always okay to skip or modify a pose.

building a toned body thru yoga

Building a Toned Body through Yoga

Summer is here and that means ice cream, gorgeous sunsets, and…bathing suit weather. Some of us are ready to show off our bikini-ready bodies, while others downright dread bathing suit season and just opt for the one-piece with the cover-up instead. What I notice is that the older I get, the harder it is to shape my midsection. Due to metabolism slowing down as we age, it takes extra attention on my part to eat healthily, and work out my body as a whole.

Many of us desire a strong, toned body. Contracting our muscles over and over again can cause the DOM’s (delayed onset muscle soreness) and pain if we don’t train mindfully. Beginners, as well as people who have never practiced, often think of yoga as a way to stretch and relax. This is partially true, of course, depending on the type of class and practice you are taking; however, a number of poses in Vinyasa classes require you to lift your own body weight. Think: Crow, arm balances and Plank poses. Yoga is the ultimate release and realignment tool because it not only builds strength but also sculpts a toned, sleek physique.

To build leg muscle:

Focus on poses that require standing for a longer amount of time. The Warrior poses (Virabhadrasanas in sanskrit) all strengthen your hamstrings and quadriceps, while also working on the rotation of the thighs, which is a serious challenge. Goddess pose (squats) build strength in the glutes & knee joint. Chair pose works your core, hip flexors, ankles, and calves (try chair up against a wall – -prepare for a super burn in the quad!). Tree pose stretches your thighs, while also strengthening your ankles.

To build core strength:

There are plenty of yoga poses that work your abdominal muscles. Plank pose and core planks are some of the best exercises for your core, especially as you work to hold it longer and longer. One of the most important tips to building strength in your core center is keeping the core engaged through the entire practice. Think of your 2 hip points like headlights shining forward. Now, it’s as if you were trying to draw those 2 hips points together to allow the headlights to cross at the navel. The abdominals draw toward one another and remain engaged throughout practice. We will continue to remind you to find a strong center as we often get lost with the other technicalities of the pose. Boat pose (Navasana in sanskrit) and low boat pose (Ardha Navasana) are also classic core yoga poses. Try mixing it up with some boat variations like twisting side to side or rocking your legs lower and higher, straightening your legs for a teaser. Power chair, leg raises, bicycle crunches and Locust are also great core poses. There’s seriously SO many core exercises to utilize in a yoga practice that it would be impossible to list them all.

To build arm strength:

When you’re ready to train your arms, try these poses. Side Plank (Vashistasana in sanskrit) requires you to support your body weight with only one arm, which works your shoulders and wrists. Crow pose is the one many people consider scary or impossible. With practice (and guidance) you’ll be able to master this fun asana. In fact, it is usually the first arm balance that we learn as beginners. The first time you reach Crow successfully, it’s like-whoa. — I can’t believe I didn’t face plant!

Each of these poses may feel like it’s targeting a specific part of your body. However, they actually require the use of multiple muscles at the same time. For example, side plank may make your arms quiver, but your obliques will hurt the next day too. Compound movements filtered into our Yoga Fever classes make building strength a more efficient reality because we encourage alignment and muscular engagement. It’s truly key to building strength and flexibility quickly. If you’re just moving your body from pose to pose without being cued how to engage and where, you are missing the Navasana (boat)!

As you can see, yoga is a great practice for building a lean, toned body. And all of these benefits are yours for the taking. But, don’t forget that like any exercise regimen, it takes work and commitment. Practicing yoga once or twice a week is just not going to cut it. Sadly, you’ll lose the physical advantage you gained and will take a step back if you miss too many days.

savasana the sponge pose

Savasana: The Sponge Pose

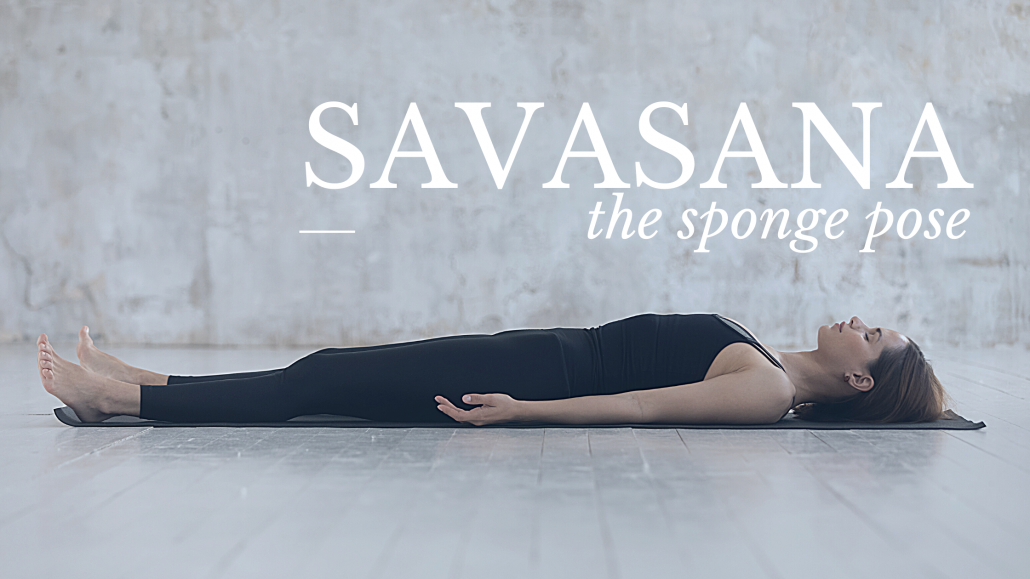
Savasana might look like a nap at the end of your yoga practice. But it’s actually a fully conscious pose aimed at being awake, yet completely relaxed. This makes it one of the most challenging poses in yoga because it asks you to become perfectly still and quiet in your body and mind without drifting off into snoozeville. Yes, it’s possible. Don’t be discouraged – read on.

Its Sanskrit name, “Savasana” (shah-VAHS-uh-nuh), comes from two words. The first is “Sava” (meaning “corpse”), and the second is “asana” (meaning “pose”). We like to refer to this pose as the “sponge pose”. It’s where you absorb all of the benefits and the mental imprint of the shapes you just created with your body. In Savasana, you lie completely on your back with your eyes closed. You gradually relax one body part at a time, one muscle at a time, and one thought at a time. This my friends, is FREEDOM.

Practicing Savasana stimulates your parasympathetic nervous system, which is the opposite of the sympathetic nervous system (that “fight or flight” concept) that’s activated during the rest of yoga practice. Relaxing your physical body offers numerous benefits, including lowered blood pressure, a decreased heart rate, and less muscle tension. Furthermore, it results in reduced occurrence of headaches, improved concentration and memory, and relief from anxiety and panic attacks.

Unlike active, physically demanding poses, Savasana requires a conscious decision to soften the dialogue in your mind and surrender fully into a state of presence. We move from a state of “doing” yoga to a state of simply “being” yoga.

And, folks, this is hard.

We must not only relax our muscles, but also become equally skilled at letting our mental chatter (chitta) vanish for the benefits of this pose to occur. Unfortunately, our bodies and minds often throw us a number of distractions. And that’s okay. Just become the witness and observe each distraction for what it is. Allow it to flow into your mind and watch it leave just as quickly as it entered. This is part of the process. A few examples of distractions may be you have an itch or your body might feel sweaty. Your mind might think: “Did I ever send that email?” or “What’s for dinner?” Perhaps you think: “Come on, relax already!” or “Zzzz…”

So, don’t underestimate the art of relaxation. Many yoga students who can easily balance, bend, and twist throughout class, struggle when it comes to lying on the floor. You can’t demand relaxation – anyone who’s ever had trouble falling asleep at night knows this. That’s why we thought we’d share five simple steps that can help you improve your Savasana practice.

Steps to a Successful Savasana:

  • Set yourself up for success– Stretch out on your mat, making sure you’re completely comfortable. Place a blanket under your head or lower back for additional support if needed. The more relaxed and comfortable you are as you begin your Savasana, the more you can easily surrender your thoughts and mind.
  • Take one large, cleansing breath– This last, audible exhale signals to your body to release into Savasana and gives you a sense of accomplishment for showing up and doing your best. It also is a detoxifying breath to let go of any remaining stress or negative residue.
  • Scan for tension– In your mind, run through each part of your body and draw it closer to the ground. Evaluate places of tension, especially those hiding in your jaw, temples, shoulders, and hips. Stress often accumulates in these areas.
  • Notice your thought patterns– Some days will be easier than others. That’s okay! Try to be at ease, trusting the power of your breath. Look out for the peaceful moments of quiet between your thoughts. Gradually, these will become longer and longer – and you’ll discover more inner quiet.
  • Exit gently– To leave the pose, first begin to wake your body by slowly wiggling your fingertips and toes. Continue by rolling your wrists and feet. Then, roll gently onto one side in the fetal position, cradling your head with your arm. Take several breaths here before pressing your hands against the floor and lifting your torso into a seated position with your eyes closed. It’s important to exit Savasana gracefully, allowing your body the time and space to return to reality.

In our rapidly moving world, cultivating the art of Savasana is more valuable than ever. While our society tends to place great value on speed and productivity, learning how to do nothing is a skill that can help you become more productive when you need to be.

5 tips for teaching yoga to your kids

5 Tips for Teaching Yoga to Your Kids

Today we’re thinking about all our parents, educators and anyone who works with children. Have your kids ever tried to climb on your mat with you, or watched with eager eyes as you practice yoga? If you’re a teacher, do you ever find yourself in need of a way to help your little ones release some stress in a controlled fashion? If you’ve never tried teaching your kids a yoga pose, now’s the time.

Children live in the fast-paced world of busy parents, school pressures, after-school hobbies, competitive sports and more. Encouraging them to develop a yoga practice can help counter these stressors. Starting yoga early is a wonderful habit for children. Yoga encourages self-esteem and body awareness with a non-competitive physical activity. It helps them feel more focused, calm and confident. From antsy five-year-olds to exhausted fourteen-year-olds, yoga offers a handful of benefits that help kids re-energize, release stress and increase their self-awareness.

5 tips for teaching your children yoga:

  • Focus on the basics– Start with simple poses, such as Downward Dog, Tree Pose or Warrior II. Show them the proper form, but expect quite a bit of wiggling and mistakes as they learn. If you have a group of children you’re teaching, try a form of duck-duck-goose to quiz them on the names of a few poses.
  • Get them their own yoga gear – Let them pick out a fun pair of leggings or a yoga mat. This way, they can begin making their practice their own – they’ll be excited to roll out their own mat and get jiggy with their down dog.
  • Play with animal poses– At young ages, children are naturally quite flexible. Ask them to go further in their poses (when they’re ready). To get started try Butterfly, Cobra, Happy Baby and Tree as these will likely resonate with children. They have the chance to be more playful and silly as they try to maintain balance, roll around, giggle, and try again.
  • Share mindfulness techniques– Allow them to find the present moment and engage with the surroundings around them with their eyes closed. Notice sounds, scents, tastes, energy points etc. they see if they can find deeper breathing without straining or trying to hard.
  • Keep it lighthearted– For young children, you can’t expect their attention spans to last as long as yours. (We’re sure you already know this) Aim for five-ten minute intervals, mixed in with some fun breathing and mindfulness training.

Once you teach your children the basics of yoga and mindfulness, they can begin to incorporate the beloved practice into their own daily lives. Help your little ones realize that movement and mindfulness is a great release from frustrations at school or in their relationships. Show your older children the value of yoga as a stress reliever from the competitive nature of school, sports and clubs.


7 common yoga mistakes

7 Common Yoga Mistakes & How to Fix Them

Our goal is to guide you throughout your yoga journey, helping you grow in strength, flexibility, cardio and mindfulness while preventing you from facing injury or discouragement. In this week’s blog we offer tips to help you avoid seven common yoga mistakes. Are you ready to get the most out of your yoga practice?

Mistake #1: Comparing yourself to your neighbor

One of the most effective ways to get injured or discouraged is looking at your neighbor and trying to mirror their pose or stretch. All of us have different body types and skill sets. The person on the mat next to you might be a former ballerina or athlete; they might have years of yoga experience under their belts; or they might be naturally flexible. Yoga is a personal journey, so there’s no reason you should be comparing yourself to anyone else.

Pro-Tip: When you find yourself trying to bend into a pose that your neighbor can do, take a moment to close your eyes, focus on your breathing and center yourself again. Remember, yoga is not about measuring your level of performance. It is about harnessing the energy to tame the mind and shedding our negative behavior and patterns.

Mistake #2: Comparing your body to the way it was 20 years ago, 2 weeks ago, or even yesterday

Remember when you were eight years old? You could practically do a cartwheel and wheel pose in your sleep. Your body moved where you wanted it to without even thinking about it. But that was when you were younger – before you sat in a desk for hours straight, or had a child of your own, experienced an injury or had a life full of stress, bills and interpersonal relationships. We carry stress and trauma deep within the tissues of the body. Limiting our movement and our mind.

Pro-Tip: Take a moment before class to meditate on the phrase: “Here I am. This is where I’m at with my body and strength today.” Always try to meet yourself where you are at – in the now.

Mistake #3: Pushing your body to do too much

Yoga beginners often mistakenly think that it will be a piece of cake. Maybe they’ve been exercising or playing sports for years. Although certain yoga poses seem simple, it’s best to listen carefully to your teacher’s instructions and ease into the practice without looking for an edge. Going slow and moving to the point of sensation as a newbie. It’s easy to fall prey to questions like “Why can’t I touch my toes yet?” or “Why is this not getting any easier?” The beauty of yoga is that it benefits you on many levels. Maybe you can’t touch your toes yet, but instead you’ve learned to modify to a better plank or breathe more effectively.

Pro-Tip: Take the most modified pose you can do correctly, in order to create strength and proper alignment rather than creating negative habits. Engage as many muscles by hugging the muscles to the bone throughout the entire practice. Instead of going deep, go strong.

Mistake #4: Practicing inconsistently

You know that feeling right after you finish a yoga class? You feel open, relaxed and focused – you can’t wait to come back for another one. But all of us lead busy lives and eventually our work, social life and family responsibilities begin to interfere. When you finally do return to class, you’ve lost what you thought you had gained. Don’t worry!! The mat is always there for you to build your strength and flexibility. The key is being ready. When you are ready to get consistent, your body will gradually open up, strengthen and move further into the poses. It just takes time and patience.

Pro-Tip: Commit to practicing yoga twice a week, even if that occasionally means rolling the mat out in your own basement and sitting in a seated position for meditation. Build a relationship with your mat. It can quickly become a good friend, guide and safe zone.

Mistake #5: Holding your breath

We often see students failing to let their breath lead them through the sequences or even holding it completely, especially during the more advanced poses. Forgetting to breathe consistently is a negative habit that causes anxiety and stress, exactly the opposite effect we seek in yoga.

Pro-Tip: Focus on your slow, deep inhales and exhales throughout the whole yoga class.

Mistake #6: Taking classes that are too advanced

If you’re a beginner to yoga, you really should look into trying a few slow or gentle flow classes first. These offer the opportunity to learn the poses, discover yogic breath and become comfortable within the practice. However, even the more advanced students would benefit from remembering the positive effects of slowing it down once in awhile.

Mistake #7: Failing to disclose medical/physical conditions

When you visit many of our classes at Yoga Fever, you’ll hear your teacher ask if there are any injuries or medical conditions he or she should be aware of. Students often feel embarrassed or too shy to speak up here. Your teachers want to know these issues so they can craft a restorative practice that won’t endanger your body.

Pro-Tip: Yoga is therapeutic. An experienced, intelligent teacher will help you overcome these injuries. Speak up.

yoga fuel the importance of breathing

Yoga Fuel: The Importance of Breathing

If we breathe automatically and hardly think about it during the day, why is breath emphasized so much during yoga class? And how is it even possible to breathe incorrectly?

These questions are common among beginner yogis, and they’re worth discussing. Awareness of breath, as well as synchronizing breath to movement, is an integral part of yoga.

Mechanically speaking, the act of breathing can be either automatic (an unconscious, involuntary behavior) or deliberate (a conscious, voluntary behavior). By making an automatic behavior deliberate, we begin to affect our neurological programming through a state of intentional awareness. This conscious breathing affects us biologically, emotionally and physically.

Biologically:

During most of the day when we’re breathing unconsciously, our breath is controlled by the medulla oblongata (the primitive part of the brain). When we switch to conscious breathing, it stimulates the cerebral cortex (the more evolved areas of the brain). It’s in that moment that the magic starts to happen! Activating the cerebral cortex has a relaxing and balancing effect on our emotions, which leads us into the next benefit of intentional breath.

Emotionally:

When you begin to tune into your breath like this, emotional stress and random thoughts vanish. Your whole system gets a break. Your body’s energy begins flowing freely, disrupting any emotional and physical blockages and freeing your body and mind. This results in that “feel good” effect you experience after a yoga practice.

Physically:

In our physical yoga practice, the breath works side-by-side with our structural alignment. Our natural tendency is to hold our breath or use stress-induced breathing (short and shallow) while holding a posture, especially in a challenging pose. This creates stress and tension in the body. That’s why you always hear yoga teachers reminding students to continue breathing intentionally during the toughest poses and sequences.

Now, you’re probably wondering exactly how you’re supposed to breathe…. In yoga, there are a variety of different breathing styles. We’ll highlight one here called Ujjayi (ocean sounding breath). When done correctly, it calms the mind, creates internal heat and gives an uplifting boost of energy. Like most aspects of yoga, it requires practice, patience and an open mind and heart. To do this type of breath, try the following sequence:

With your mouth open, try exhaling the sound “HAAAAH” – similar to the sound you make when you’re trying to fog up a mirror. Get comfortable with this sound to get the hang of the practice.
Close your mouth and attempt a similar sound, feeling the outflow of air through your nasal passages. If you’re doing this correctly, you should sound like waves in the ocean (or Darth Vader).

Generally, you should incorporate a positive resolve or mantra into every yoga session. This can be a single word or phrase that serves as a goal for your practice. This mantra should be integrated into your breathing process. When you inhale, gather up the stress or worries in your mind; when you exhale, imagine that stress flowing out of your entire body.

We’re willing to bet you had no idea how important – and complex – your breath is. What seems like an automatic process is actually critical to mindfulness, stress removal and energy creation.

If you’re ready to practice the art of yogic breathing, come join us for yoga class. And don’t forget to incorporate conscious breath into your daily life. When you’re feeling stressed or tired at work, school or home, spend two minutes focusing on deep inhales and exhales. You’ll be surprised how great you’ll feel after.

“A yogi measures the span of life by the number of breaths, not by the number of years.” -Swami Sivananda