All about yoga blocks

All About Yoga Blocks

A lot of new yogis tend to shy away from using blocks, thinking the props will quickly betray them as a beginner, incapable of mastering all of the poses. They feel the whole point of yoga is to become flexible enough to do every pose without using a prop.

Don’t be ashamed if you’ve ever thought this yourself! The truth is, blocks are critical to everyone’s yoga practice, whether brand new or a yoga master. The trick is to let go of your ego-based “How does this make me look?” approach and shift toward the “How does this make my body feel?” mentality.

Why Use Yoga Blocks?

A yoga block is a brick-shaped item made of either cork, wood, or foam. You can achieve three different heights (4, 6, and 9 inches) depending on the way you flip your brick. Blocks (and other yoga props) help you enter postures safely with proper alignment, ensuring you are not only safe but also experience the benefits of the pose – even if your hamstrings are tight.

If you’re new to yoga, they help you train your body to bend, twist, and stretch. If you’re experiencing an injury, they help you modify your practice so you can continue to recover. And even if you’re perfectly healthy and have been practicing for years, there are days your body just needs a little help – and that’s okay!

1. They Bring the Ground to You– Try using blocks under your hands in forward folds to release the strain on your hamstrings as you stretch toward the ground. We’ll often encourage them in the trickier folds, like half moon and standing splits. But, if you’re a beginner, don’t be afraid to grab two to use during standing forward fold too.

2. They Build Strength– Stretching isn’t the only benefit of blocks! They can be used for strength-building exercises just as well. In the studio, we often ask students to put a block between their legs during ab exercises or wheel pose. It introduces an additional element of resistance, ensuring you’re getting the most out of your efforts.

3. They Allow You to Rest in Restorative Poses– Finally, blocks can be used to tone down the intensity of yoga poses. They support you so that you can still experience the positive effects without exerting as much effort. I love using a block for a restorative bridge pose at the beginning or end of class.

Time for to Level Up

The beauty of yoga is its acceptance of students of all levels of experience, flexibility, and strength. Using blocks and other props is not something to shy away from, and I truly hope you’ll all continue to embrace their ability to help you modify, strengthen, or rest – depending on your need each time you step on your mat. Join us for a yoga class to try it out!

yoga and running go hand in hand

Yoga and Running Go Hand-in-Hand 

I commonly hear runners praising the addition of yoga to their practice. However, many yogis often shudder when thinking about running. Maybe this is because we often hear about the dangers of running: it will ruin your joints and compromise your yoga practice. But I always wonder, why can’t yogis embrace running, as well?
I’m here to tell you that many of the skills and physical and mental strength you have built up through yoga will highly benefit your running practice too.

4 Reasons Yogis Are Prepared to Be Runners

  1. You Already Have a Strong Core- Despite what some running novices may think, the sport is not all about leg strength. It’s a full-body effort, meaning that core strength is a huge factor. Additionally, upper body strength is essential to keeping your back and shoulders from tensing up as the mileage increases.
  2. You’re Already Tuned into Your Breath- The breath awareness we yogis practice on our mats is immeasurably valuable when it comes to endurance training. The longer you run, the more important it is for your body and mind to connect, preventing you from getting distracted or quitting. If this body-mind connection sounds like the effortless calm you feel during yoga practice, that’s because it is!
  3. You’re Prepared for the Meditative Side of Running- Speaking of this body-mind connection, running is essentially a meditation. When we run, we aim to immerse ourselves in the present, eliminating unnecessary movements to find ease in the midst of a strenuous physical effort. I like to think yogis have a huge step up in this department because we’re used to adjusting our bodies to balance our muscles and limbs.
  4. You Already Know How to Rehabilitate Tight Muscles- I saved the most obvious for last. One of the most common factors that brings runners into the yoga studio is a desire to learn to stretch, twist, and rehabilitate tight muscles. For yogis making the leap into running, or for those already combining the two practices, it may be hard to give up the excitement of vinyasa and fun arm balances in favor of slower movements, but this is exactly what your body will need. Try exploring tight nooks and take your practice down a notch as you discover the ways each practice complements the other. I recommend giving Yin yoga a try!

Importance of combining two different physical/mental practices

Yoga Gives Your Competitive Side a Rest: The beauty of yoga is that it’s not a competitive sport. Sure, you may motivate yourself daily to improve and show up on the mat, but at the end of the day no one comes in first or last. Sometimes it’s nice to rest the competitive side of your brain, but other times it’s fun to enter a 5k and see how your body has improved over the course of the last few weeks or months. Yoga and running don’t live in different universes; they’re two sides of the same coin, complementing each other and filling in the gaps.
Yoga Moves Your Body on a Different Plane: Runners continually move one direction in space, whereas one of the greatest benefits of yoga is that you get to move your body along an entirely different plane. On our mats, we twist, we turn, and we invert our bodies. As anyone who has ever stepped into a yoga studio knows, you’ll discover muscles you never knew existed. While runners are some of fittest people around, many experience strength and flexibility issues, which isn’t surprising when you consider how many times they pound the ground each mile. Another reason to incorporate both practices into your weekly routine!

So, whether you’ve been combining running and yoga for years, or you’re convinced now might be the time to give it a shot, I’d love to invite you to our first Yoga Flow + Trail Run event taking place Saturday, July 14 from 9:30-11:00am at Robinette’s – Oh and PS, don’t worry about the weather, we always have a rain date scheduled!!

The movements inherent in yoga and trail running may seem tremendously different, but they share one key trait: both put you in the present moment. If you lose focus for just one moment, you could wind up face down on your mat or in the dirt. We’ll start with a 40 minute yoga flow, building the muscle strength and range of motion needed to help you dance over rocks and roots on the 2 mile trail run.

why do we use Sanskrit in yoga

Why Do We Use Sanskrit in Yoga?

AUM or Om  ( Sanskrit : ॐ) is a sacred sound or vibration from which all the manifest universe emanates.

Whether you’re new or a seasoned yogi, chances are you’ve heard at least a few Sanskrit words. Sanskrit is the ancient language the first yogis spoke and the language in which many historic yoga texts were written.

At Yoga Fever we teach Sanskrit in our teacher training courses, but we also use it often throughout our classes (not ALL of our teachers use it!). I personally love teaching Sanskrit, as it connects us to the history and origins of the practice, helping students better understand where the practice came from.

More and more, people are coming to understand that there’s a deep and rich philosophy beneath yoga practice. Sanskrit is the language by which that philosophy lives, breathes, and flows.

Why Do We Use Sanskrit?

Sanskrit literally connects us to the classical form of yoga that has been orally repeated for thousands of years.

When we use Sanskrit in our classes, we help students like you not only follow our directions but also get the most out of each session. Each Sanskrit word is believed to have its own consciousness, and pronouncing the word allows you to tap into that consciousness.

Through Sanskrit students are able to understand spiritual concepts that aren’t readily available in English. No other language can translate the mystical, transcendent, and divine as effectively.

It’s important for all of us, both teachers and students, to remember to be patient. We teachers repeat certain Sanskrit pose names often throughout class, as it often takes up to seven repetitions of a word for most people to remember it. Learning a foreign language takes a long time, but understanding some of the roots and most common words is a great first step! Read on my studious yogis.

Sanskrit Crash Course

Asana– This word refers to the poses that compile the physical practice of yoga. Maybe you’ve noticed that each individual pose ends in “asana.” For example:
Sukhasana- Easy Pose (the cross-legged, sitting position usually taken at the end of class)
Balasana- Child’s Pose

Ardha– A word which means “half,” ardha is used in poses like Ardha Chandrasana (Half Moon pose).

Namaste– The universal greeting, namaste is a combination of two Sanskrit words: nama, which means “bow” and te, which means “you.” It can be translated a number of different ways, but I often explain it like this: “the light within me recognizes and honors that very same light within you.”

Kona– This component means “angle,” or “corner.” Examples include Utthita Parsvakonasana (Extended Side Angle pose) and Trikonasana (Triangle pose). I bet you can think of more!

Supta– This component means “reclined” and is used in many poses that ask you to lie on your back, such as Supta Padangusthasana (Reclining Hand-to-Big-Toe pose).

Ujjayi– You’ll hear us refer to this yoga breathing technique as “ocean-sounding breath.” It’s practiced with a slight constriction in the back of the throat so that an audible sound can be heard.

Now that you have a basic understanding of a few Sanskrit words, come attend one of our yoga classes. You’ll be excited to discover how much of our yoga practice includes these simple components!

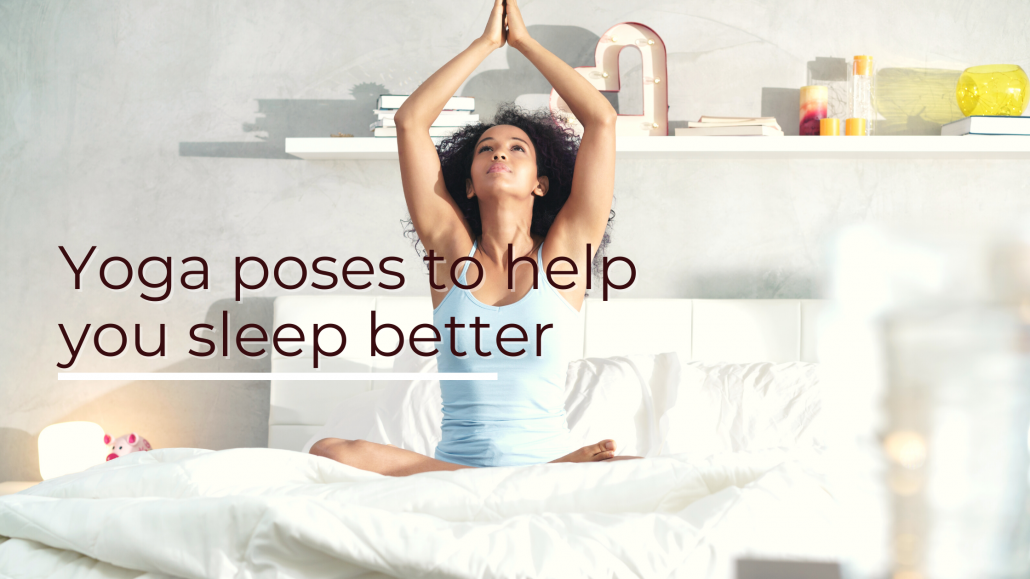
yoga poses to help you sleep better

Yoga Poses to Help You Sleep Better

Are you having trouble falling asleep at night? Do you wake up for work in the morning simply exhausted from tossing and turning? You’re not alone – and it could be costing you more than you think. Research shows that consistent lack of sleep can lead to associated health problems, such as anxiety, depression, and diabetes.

But a good night’s sleep is within your reach thanks to, you guessed it, yoga!

Yoga practice doesn’t always have to be an intense, blood-pumping, sweaty workout. Some of the most amazing aspects of yoga are the subtle changes you experience through focused breathing and bodily awareness. I’ve found that taking a few minutes at the end of my day for yoga and meditation are essential to unwinding and relaxing before bedtime.

So, how exactly does yoga help us sleep better?

Yoga helps us get in touch with our breath. When you slow down and hold a pose, you’ll identify different areas of your body that are tense – think: shoulders, hips, back. The longer you sit and breathe through the pose, the better your chances of releasing that tension and gradually letting go. Plus, stretching in general has a wonderful calming effect.

Yoga reduces stress. Difficult and exciting events both bring stress into our lives. Whether you’re in the middle of a demanding season at work or preparing to marry the love of your life, you’ll likely experience stress. Practicing yoga mindfulness before bed will help reduce levels of cortisol (ie: the stress hormone), reducing the amount of time you spend tossing and turning.
Yoga helps us create a routine. If you’ve ever struggled with sleeping, you’ve probably heard advice like “go to bed and wake up at the same time each day” or “don’t look at your phone before bed.” While these practices may work for some, I’ve found that yoga has the most significant impact in creating a routine that works for me. Ten minutes of gentle yoga before bed can do wonders in setting you on the right path.

Yoga helps us handle uncertainty. One of the biggest culprits of insomnia is a restless mind. Often, my body is physically exhausted, but my mind won’t zip it! I’ll stress about additions to my planner, adding activities in tight spaces, upcoming events. Adapting to a yoga-before-bed practice helps me accept where I am in each moment. And, sometimes, where I am is…awake. This acceptance that I can’t sleep actually helps me be able to relax more. It’s weird, but it really does help eliminate the anger and frustration.

Looking for a few poses to aid sleep? Here’s a sample routine:

  • Hero’s pose | Virasana – take this opportunity to lengthen your spine and open your chest. Settle into your calming breath pattern and clear your mind.
  • Cat and cow– Roll forward onto your hands and knees, flowing between these two poses for as long as you like.
  • Child’s pose | Balasana – Sink your hips back and settle your chest onto the floor. Breathe deeply through your belly and lower back.
  • Legs up the wall | Viparita karani – This helps drain acid from your legs, decreasing symptoms of fatigue and soreness. Stay here as long as you like.
  • Supine twist– This is a great back stretch, helping you relax and prepare for sleep.
  • Happy baby | Ananda balasana – Gently rock back and forth on your back to massage your spine.
  • Butterfly pose | Suptabaddhakonasana – a supported butterfly can help you relax deeply while focusing on the breath.
  • Savasana- It’s called corpse pose for a reason! Use this as the final pose before crawling into bed, closing your eyes and freeing your mind from thoughts.
4 key steps to building an arm balance

4 Key Steps to Building an Arm Balance Practice

Arm balances are everywhere these days. They pop up on Instagram and yoga studio posters as the epitome of yoga accomplishment. Yet, they’re often among the most frightening poses for students to try. The concept of flying fearlessly into wild, inverted poses plagues many yogis.

I’m here to tell you: this collection of poses is not reserved for advanced yoga practitioners. With a few tips and tricks (plus practice, practice, practice), you’ll find yourself in Crow, Hurdler, and Headstand in no time!

Benefits of Arm Balances

First off, why bother practicing arm balances in the first place? Balancing poses help us connect with the present moment. And when you add in the challenge of balancing on your arms, the amount of mental focus required increases. You’re never going to get up into a headstand if you’re thinking about the day’s to-do list. Practice arm balances if you’re in need of a strengthened mental focus.

Additionally, arm balances increase flexibility, core and shoulder strength, as well as feelings of self-confidence and courage. Plus, they offer a playful and curious way to approach our bodies!

What’s not to love? If you’re eager to give these a try, but maybe a bit scared about how to begin, read on for four tips to help you build your arm balance practice.

4 Key Steps to Building an Arm Balance Practice

Confidence- Honestly, guys building confidence is key to arm balancing. We are all a bit nervous about face planting. It happens every now and then. So what?! It’s totally okay to fall out of the pose and laugh your ass off. We all do it. The more we practice balancing on our hands, the more confidence and strength we will gain. It just takes time, practice and patience.

Strategic Weight Placement– How many times have you heard your instructor remind you not to put your weight into the heel of your hand? This is because when your weight is in the palm of your hands, there’s nothing to stop you from falling backward. Instead, strategically place your body weight between your thumb and pointer finger – pushing more into your knuckles than the heel of your hand. By moving the balance point forward like this, you instantly gain more control.

Shoulder Strength – Your shoulder blades are a critical, and often neglected, body part when moving into arm balances. You need them to support your arms, especially when you’re in a straight-arm balance. We often help students increase scapular strength by holding an engaged Plank pose, asking them to puff up between the shoulder blades – almost like a Cat Pose.

Core strength- All balance poses rely heavily on a strong core, and arm balances are no exception. To build an arm balance practice, you must learn to lock off one part of your body (example: core) so you can use that stability to launch into more complicated poses. We often encourage students to focus on their core by asking them to flex their belly during every single yoga pose of the class. Eventually, engaging the core will become second nature.

why are so many yoga poses named after animal poses

Why are So Many Yoga Poses Named after Animals?


Cats, cows, and cobras – oh my! Do you ever feel like you’re at the zoo during the middle of yoga class? Yoga asanas (or poses) include crow, eagle, downward dog, pigeon, lizard, dragon (okay, maybe that’s not a real animal), and so many others. This may lead you to ask: why are so many yoga poses named after animals?

While there is no foolproof answer, most theories revolve around the idea that ancient yogis mimicked what they saw around them. In those simpler times, it’s understandable that they would have had many encounters with various live animals. Maybe they were hunting them, avoiding them, or simply observing them. Regardless, it’s not just animals that they learned from. A number of other poses exist that resemble items around them. Think: tree, wheel, and mountain.

It appears that the ancient yogis found imitating animals to be an enlightening experience for both the body and mind.

Animals have ample opportunity to release their emotions and tension through hormonal changes in their bodies. We often call this the “fight or flight” response. For instance, snowshoe hares often face multiple predators at a time – any of whom might make them their dinner that day. Yet, they don’t get sick, they don’t die, they don’t become depressed. They continue living and reproducing.

As humans, we often struggle to keep ourselves aligned – we do fall victim to that sickness, worry, and depression. The busyness and high stress levels we place on ourselves prevent us from becoming aware of our bodies’ sensations.

So, it makes sense that the ancient yoga masters would have chosen to model their practice after the animals they observed – in the hopes of learning to balance their emotions and stress patterns. When we enter an animal-named pose, we both endure a physical exercise and experience a psychological exercise of embodying the symbolism of that particular animal.

Consider the cat, an expert in relaxation. On awakening from sleep, they instinctively stretch and arch their spine in both directions before softening and moving onward. Doesn’t it make sense, then, that we generally use cat as an “awakening” pose at the beginning of practice, gradually loosening our body?

Or think about the cobra as it slowly prepares itself for action. A rather vulnerable animal itself, the cobra cautiously readies itself for attack by raising its head. We, too, practice awakening our dormant energy in this pose, often using it as a prelude to a full chaturanga.

When you think about it, many of our animal poses really do resemble the creature they’re named after. Next time your instructor calls out an animal pose, try to put yourself in that animal’s shoes (so to speak!) and consider why they do what they do. For example, dogs enter downward dog position when waking from a nap as a way to stretch.

What’s your favorite animal pose?

4 reasons yoga reduces stress

4 Reasons Why Yoga Reduces Stress

Stress and anxiety exist in each of our lives. It’s unavoidable and part of the human experience. However, that doesn’t mean we can’t find ways to manage or reduce the impact that stressful situations have on us. Our daily responsibilities and worries don’t need to overwhelm us. And that, is where yoga comes in.

Let’s talk about four ways that yoga reduces stress and anxiety in our lives.

4 Reasons Why Yoga Reduces Stress

Yoga balances our body – The practice of yoga actually counteracts the influence of stress, which often drains our energy and leaves us tense, tight, and tired. Instead, yoga does wonders in reducing tension – almost like a massage does. Child’s pose is, perhaps, the quintessential example of the way yoga helps us decompress. It’s often used as a resting pose or counter-pose to backbends and inversions, allowing our spinal column to relax and inducing a sense of both physical and spiritual surrender. Each time our forehead rests on the earth, it signals the body it’s time for rest, peace, and quiet.

Yoga balances our mind – In addition to treating our body with care, yoga teaches us to befriend and quiet the dancing/monkey mind. As we cultivate presence and compassion, we’re able to hone in on the actions we can take right now, in this moment. Yoga allows us to ease our frantic mind, and forget about our long to-do lists for the duration of the class. Whether we’re holding a pose or flowing through a sequence, yoga teaches us to focus.  We become as some athletes call in ‘the zone’. In other words, everything else fades away and we become one with the task at hand — i.e. yoga.

Yoga balances our nervous system – Whenever we experience stress, our nervous system begins to act up, stimulating high adrenaline and blood pressure levels. While necessary in some dangerous scenarios, this reaction can be chronic when triggered repeatedly. We use the breath as our guide in yoga. Instructors constantly remind their students (and themselves) to steady and deepen their breath, through controlled, and sometimes numbered, breath patterns. The process of learning to steady and deepen our breath allows our whole nervous system to calm down and feel peace. As yogis, we know the quickest way to the present moment is through the breath. This is a great lesson we can apply outside the studio when tough situations arise; focus on awareness of breath. Use the breath to calm yourself down and find the present moment. Even when we are facing the eye of the storm.

Yoga helps us understand how our mind works – In my opinion, this is the most important point when it comes to long-term stress management. Most of our anxiety results from the way our minds operate to various challenges. The mind can help heal us or it can help cripple us. Yoga practice forces us into mindful awareness of the way in which we react to difficult situations. For example, when you find yourself in a tough place on your mat, do you immediately pull out of the pose? Do you push yourself harder? Do you get angry at the teacher? None of these responses are wrong or right. The point, rather, is that once you identify the way you respond to stress, you’ll be able to consciously choose a different response in the future – preparing yourself to fight back against stress and anxiety.

As you see, yoga allows us to slow down and really tune in to our bodies, our mind, and our breath. By simply focusing on one thing, we’re able to decompress and relax.

Believe in the powers of your body and mind working together in unison to support your overall wellness. It’s truly key to living a peaceful and more cognizant life.

simplify your pigeon pose in yoga

Simplify Your Sleeping Pigeon


Pigeon pose was actually designed to be a back bend with a ton of variations to chose from. The west decided to add the sleeping variation which can be a bit of a love/hate relationship. It’s amazing for runners, cyclists, or anyone with tight hips. But the problem is that many of us don’t understand the proper alignment of the pigeon yoga pose, which can really compromise the safety of our knees and SI joint.

We’ll walk you through a few ways to modify this pose to make it the restorative wonder it’s meant to be – rather than the pose you endure with clenched teeth toward the end of your practice.

First, what is Sleeping Pigeon pose and why is it so beneficial?

Yoga treats stiff hips in many ways, but the most common is through a collection of poses known as hip openers. Sleeping Pigeon pose is an extremely effective hip opener that works your front leg into an external rotation, while stretching your psoas muscle (it connects your groin to your lumbar spine) in your back leg.

English please? It’s really, really, good to practice pigeon and yoga if you sit at a desk all day. And when you practice it consistently, you’ll notice significantly more ease in your lower body as you sit, walk, run and stand.

The problem is that many of us tend to thoughtlessly fold into Sleeping Pigeon, which dumps tons of stress onto our knees and sacrum. If you’re eager to improve upon this pose, read on yogis.

4 Tips for a More Pleasant Pigeon

Ease into the pose- Begin in Downward Facing Dog. Extend your right leg behind you, then bring the knee up to replace the right hand. You want a 45 degree angle from right hip to knee. More than likely, your shin is not parallel to the front of the mat (yet). With time and patience, you may get there. The heel will be close to the body and that’s A-OK. The top of your left foot is resting on the earth behind you with the toes reaching straight back to avoid sickling of the ankle. Gently melt your hips down to the ground. You want to avoid dumping all of your weight into the right side of the body.

You can choose to stay here or, for a more intense stretch, extend your arms and chest to the ground in front of you. To fully experience the pose, keep the spine long versus rounding.

Use core muscles to square your torso- Once you’re in the pose, be sure to keep your hips squared to the front of your mat. This isn’t a twisty pose, so do your best to keep both hips facing the front. How do you do this? Engage and activate your core muscle to shift your front hip back toward your extended leg.

Take up space- At this point, you may be able to descend a little deeper into the pose. With your hands planted firmly in front of you, try scooching your back leg further toward the back of your mat. With every inhale, back out of the fold a bit, seeing if you can gather just a smidge more length through your spine. Then you can take up even more space as you fold forward on your exhale.

Modify when needed- It’s always okay to utilize the props found in the studio! Slide a yoga block or rolled up towel under your hip (the bent one) for extra support. There’s nothing to be ashamed about – even the most flexible yogis have days where they need some added cushion to protect their bodies.

Finally, keep in mind that Sleeping Pigeon may not be your thing. No matter how many alignment refinements you make, this just may not be the pose for you. That’s totally fine, you guys. Ask your yoga instructor for some alternatives, such as sucirandhasana (thread the needle) or lying pigeon (where you’re on your back and pull your thigh toward you). It’s always okay to skip or modify a pose.

savasana the sponge pose

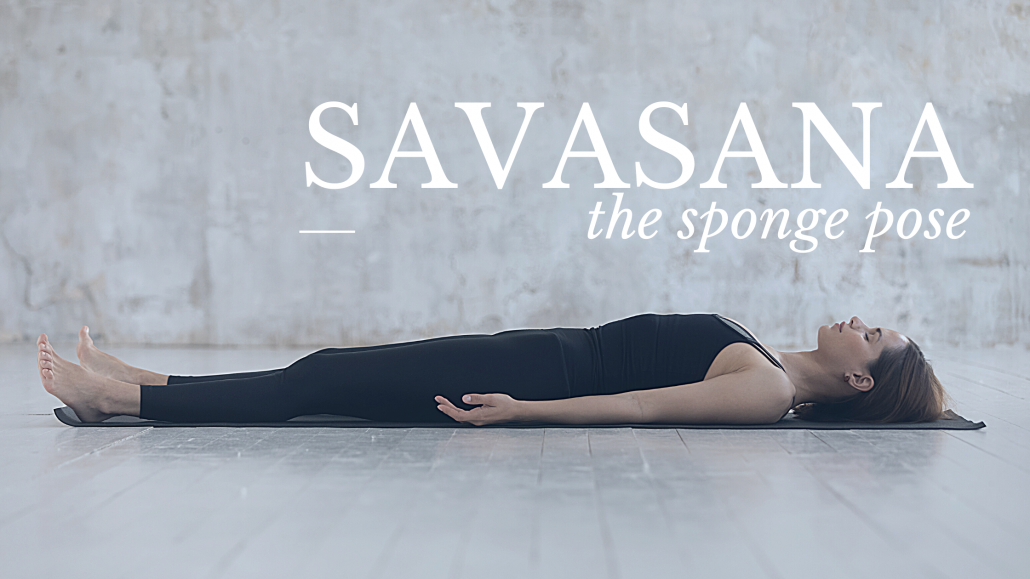
Savasana: The Sponge Pose

Savasana might look like a nap at the end of your yoga practice. But it’s actually a fully conscious pose aimed at being awake, yet completely relaxed. This makes it one of the most challenging poses in yoga because it asks you to become perfectly still and quiet in your body and mind without drifting off into snoozeville. Yes, it’s possible. Don’t be discouraged – read on.

Its Sanskrit name, “Savasana” (shah-VAHS-uh-nuh), comes from two words. The first is “Sava” (meaning “corpse”), and the second is “asana” (meaning “pose”). We like to refer to this pose as the “sponge pose”. It’s where you absorb all of the benefits and the mental imprint of the shapes you just created with your body. In Savasana, you lie completely on your back with your eyes closed. You gradually relax one body part at a time, one muscle at a time, and one thought at a time. This my friends, is FREEDOM.

Practicing Savasana stimulates your parasympathetic nervous system, which is the opposite of the sympathetic nervous system (that “fight or flight” concept) that’s activated during the rest of yoga practice. Relaxing your physical body offers numerous benefits, including lowered blood pressure, a decreased heart rate, and less muscle tension. Furthermore, it results in reduced occurrence of headaches, improved concentration and memory, and relief from anxiety and panic attacks.

Unlike active, physically demanding poses, Savasana requires a conscious decision to soften the dialogue in your mind and surrender fully into a state of presence. We move from a state of “doing” yoga to a state of simply “being” yoga.

And, folks, this is hard.

We must not only relax our muscles, but also become equally skilled at letting our mental chatter (chitta) vanish for the benefits of this pose to occur. Unfortunately, our bodies and minds often throw us a number of distractions. And that’s okay. Just become the witness and observe each distraction for what it is. Allow it to flow into your mind and watch it leave just as quickly as it entered. This is part of the process. A few examples of distractions may be you have an itch or your body might feel sweaty. Your mind might think: “Did I ever send that email?” or “What’s for dinner?” Perhaps you think: “Come on, relax already!” or “Zzzz…”

So, don’t underestimate the art of relaxation. Many yoga students who can easily balance, bend, and twist throughout class, struggle when it comes to lying on the floor. You can’t demand relaxation – anyone who’s ever had trouble falling asleep at night knows this. That’s why we thought we’d share five simple steps that can help you improve your Savasana practice.

Steps to a Successful Savasana:

  • Set yourself up for success– Stretch out on your mat, making sure you’re completely comfortable. Place a blanket under your head or lower back for additional support if needed. The more relaxed and comfortable you are as you begin your Savasana, the more you can easily surrender your thoughts and mind.
  • Take one large, cleansing breath– This last, audible exhale signals to your body to release into Savasana and gives you a sense of accomplishment for showing up and doing your best. It also is a detoxifying breath to let go of any remaining stress or negative residue.
  • Scan for tension– In your mind, run through each part of your body and draw it closer to the ground. Evaluate places of tension, especially those hiding in your jaw, temples, shoulders, and hips. Stress often accumulates in these areas.
  • Notice your thought patterns– Some days will be easier than others. That’s okay! Try to be at ease, trusting the power of your breath. Look out for the peaceful moments of quiet between your thoughts. Gradually, these will become longer and longer – and you’ll discover more inner quiet.
  • Exit gently– To leave the pose, first begin to wake your body by slowly wiggling your fingertips and toes. Continue by rolling your wrists and feet. Then, roll gently onto one side in the fetal position, cradling your head with your arm. Take several breaths here before pressing your hands against the floor and lifting your torso into a seated position with your eyes closed. It’s important to exit Savasana gracefully, allowing your body the time and space to return to reality.

In our rapidly moving world, cultivating the art of Savasana is more valuable than ever. While our society tends to place great value on speed and productivity, learning how to do nothing is a skill that can help you become more productive when you need to be.

Spice up your yoga practice

Spice Up Your Yoga Practice

Have you ever felt like skipping right to savasana before yoga class even starts? Do you find your mind wandering during class or that you’re anxious to get to the next pose? You may need a yoga reboot.

Spring is officially here, my yogi brothers and sisters. And that means new life is everywhere. It’s the perfect time to spice up your yoga practice and return to that place where yoga is the highlight of your day. We have a few suggestions on how to breathe new life (literally) into your yoga practice.

Bring a Friend

Finding a yoga buddy is a great way to add some fun to your practice. Whether you already have a friend interested in joining you, or you find someone who tends to go to the same weekly classes as you, your yoga pal can hold you accountable to show up on the mat several times each week and even enhance the bond you have with one another. Afterwards, grab a local brew or smoothie and discuss what you enjoyed, struggled with, or would like to try next time.

Set Goals

An easy way to break the monotony of your yoga practice is to constantly set new goals, whether physically or mentally. If you’re finding yourself dragging, maybe it’s time to experiment with a pose that’s always frightened you. One of the challenges of life is really to conquer our fears so why not bring that aspect to our mat? Take baby steps, but you may be surprised what your body can do once you set your mind to it. We are good at what we do a lot of, so practicing the goal pose once a day will not only begin to build your confidence, but it will enrich your overall yoga practice. Maybe your yoga goals are more breath and mind related. If so, spend time each day practicing breath techniques and meditation using guides, focal points, or just a good ol’ fashion sit and watch – sit in a crossed legged position and watch what thoughts enter your mind.

Move your Mat

It may sound silly, but simply practicing in a new part of the studio can change your practice and your perspective. Most of the population loves routine; we sit in the same desks at school, eat lunch at the same time at work, and drive the same roads to our house. When we place our mat in a new location, we can activate different physical and mental reactions to certain poses or find a new line of sight to our teacher.

“If you change the way you look at things, the things you look at change” – Dr. Wayne Dyer

Challenge your Intention

If you’re a yoga veteran, you’re used to the teacher asking students to set an intention before class. Often this is a positive word or phrase that serves as your motivation for the practice. For example, you might set your intention as “determination.” You’ll then try to stretch a little farther in each pose or hold plank just a bit longer. You might also use your breath to focus on the negative things in your life that you can’t control. With each exhale, give yourself the permission to surrender that worry, doubt and fear and let it go. When we let go of things we can’t control, we reserve valuable energy, time and space for new creativity, awareness and life.

If you are seasoned, and are ready to move past a simple intention, you could set  what we in the yoga world call a ‘sankalpa’. A sankalpa is a specific intention written by you, for you and used before, during and after your practice (or really whenever you want to find time to focus on your hearts desires). The idea of repeating a sankalpa is to create the life we are meant to enjoy and embrace. The sankalpa is impressed on the subconscious, planting the seed of manifestation in our soul. It must come from your mind,  your heart, and your hopes and dreams.

Specific intentions and sankalpas give you something to focus on other than what you’re making for dinner or the to-do list you still have to tackle later that day. They’re something you can come back to whenever you find your mind drifting or you want to center yourself.